
How I Water-Test Eggs for Freshness
As is often the case, the lunch discussion yesterday revolved around troubleshooting homestead issues. The day’s topic was egg production, spurred on in part by my reading of Little House in the Ozarks. But also because oddly low egg-production has been an on-going issue around these parts.
So we kicked around some ideas for what to change, what needs fixing up, and so on. By the time we had finished all of the salad, broth-boiled rice, and leftover meat and potatoes, we got to what is often the end of such conversations – a list of things we’d do when we had the time and money for it.
Stewart and I often joke about how futile such conversations can be. Not that the brainstorming and idea batting isn’t helpful, but if it is not peppered heavily with Lord willing it simply becomes a don’t-worry,-we’ll-figure-it-out conversation.
And that never ends well.
We parted ways, Stewart back to his work on propagating boysenberries, me back to organizing and labeling my recent canning endeavors. Generally after lunch I give the boys a short list of chores to do before school and so off they went as well.
Moments later Abram shot through the screen door beaming from ear to ear. I turned around from the kitchen sink in time to hear “Egg nest! Ma, I found an egg nest!“. The boys and I have been hunting for some such thing for weeks now, knowing that something wasn’t lining up with the numbers.
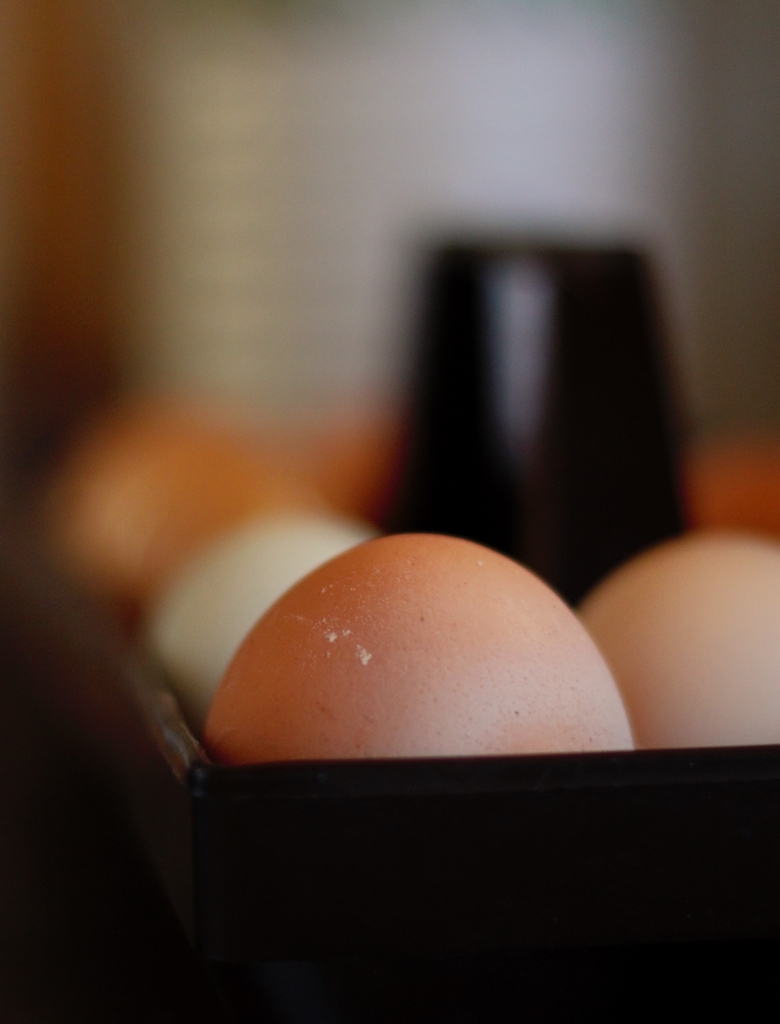
And so there it was, in an old tote filled with baby things once worn by the egg nest-finder himself – the Lord’s answer to our attempts at figuring it out. We had scrambled eggs this morning after fourteen of the nineteen eggs tested fresh using what I call the “Water-Test Method”.
The process is simple.
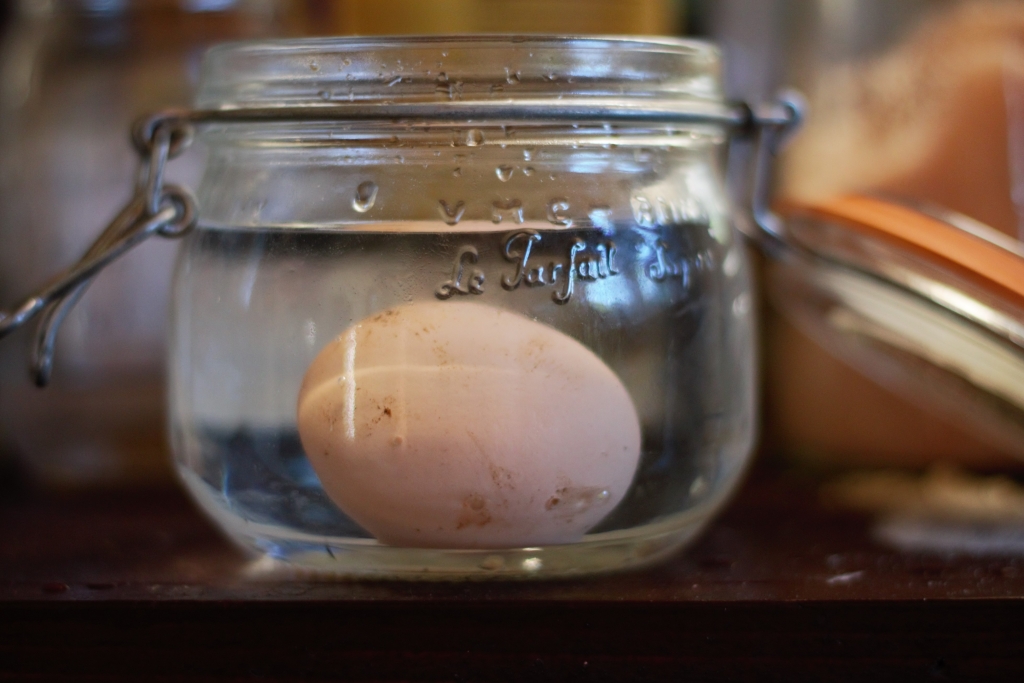
Water-Testing Eggs for Freshness
- Fill a pint-sized vessel 75% of the way with clean water.
- Carefully submerge egg in water.
- Observe for any vertical movement of the egg. You want the egg to lay on its side as in the photo above. A small variation of horizontal is fine but any large movement puts the egg into questionable territory. Some say the reason for this the air pocket in the egg, some say otherwise. Frankly, I don’t know for sure what the reasoning is but it seems to work as I’ve never cracked a rotten egg I’ve properly tested.
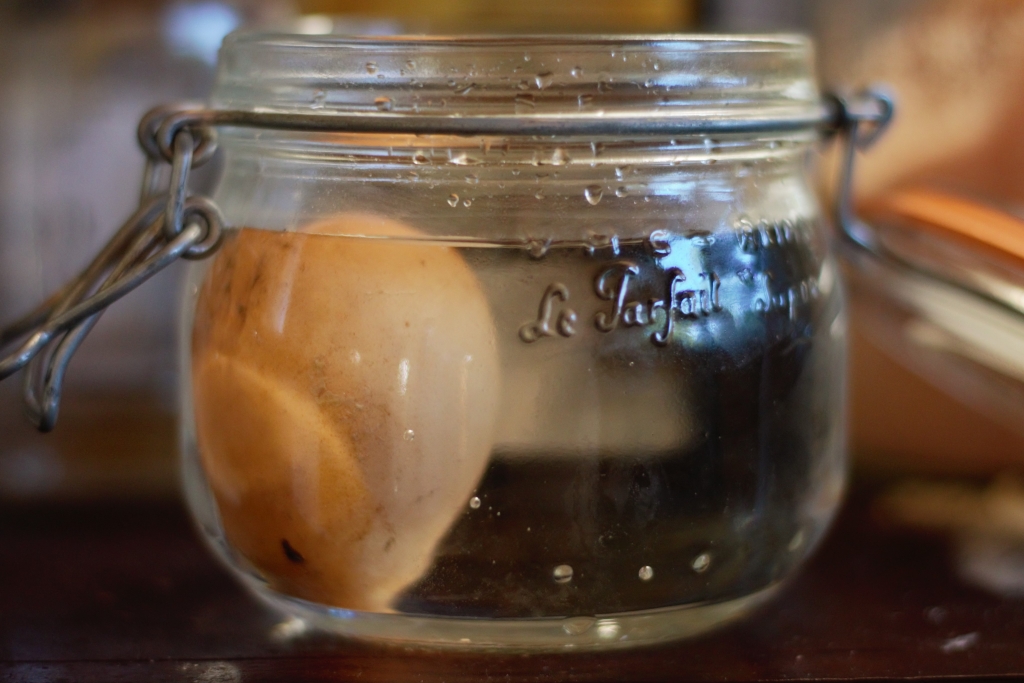
- Straight up and down, as in the photo below, is not good. Chuck that thing as far away from the house as it can get. Anything nearing a 45 degree angle is also out, in my book.
I only test the eggs just before cooking, as the washing process removes the protective coat that allows us to keep our eggs on the counter without refrigeration. Once you have culled the bad eggs, crack the fresh ones into a cast-iron skillet with a bit of lard and continue on with breakfast.
Sourdough toast, hot coffee with goat milk, and milk kefir are all good accompaniments to unexpected egg blessings.


My Mum taught me this years ago, just the same method……but…..if it stands up , break it in a saucer and smell it, if it is ok it is good to use, IF it rises off the bottom of the container at all then it is no good.
This is pretty much my method also.
I like to use less fresh eggs for hard boiling as the shells come off more easily. The easiest ones to peel are the ones that are at or close to 90 degrees. If they float at all they are no good, and I would definitely go for distance if they float on the surface.
Thank you so much for the info – it’ll come in handy.
Yes, we do the same 🙂 and I agree with Margo too.meven the vertical eggs are usually ok, especially if there are only a few in the clutch you find as they are usually not rotten. If most of my clutch did that I’d be wary ha!