
Beet and Daikon Radish Kraut
My favorite aspect of vegetable fermentation, after all these years, is still how well it lends itself to a simple, sustainable kitchen. Sometimes its about preserving a harvest. Sometimes its about making that very specific recipe we all love. Mostly, it’s about using whatever vegetables we have on hand in an enzyme-rich food that can be preserved without refrigeration.
And so, when I’d bought a bunch of beets and found a bag of organic daikon radish on clearance, kraut seemed the most logical answer. The beets would keep a bit longer in the lactic acid brine, the radishes likewise. Cabbage is almost always on our grocery list and provided the catalyst for spicy radish and sweet beet to combine.
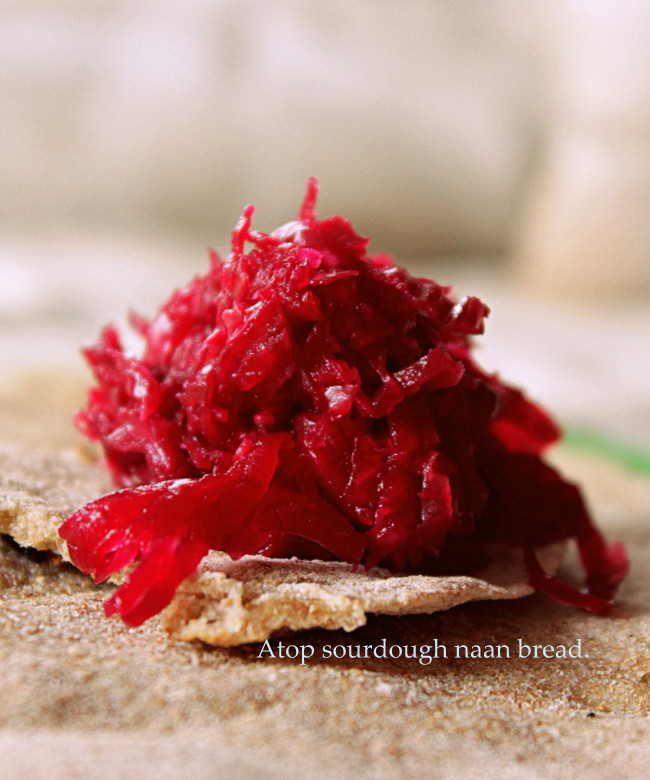
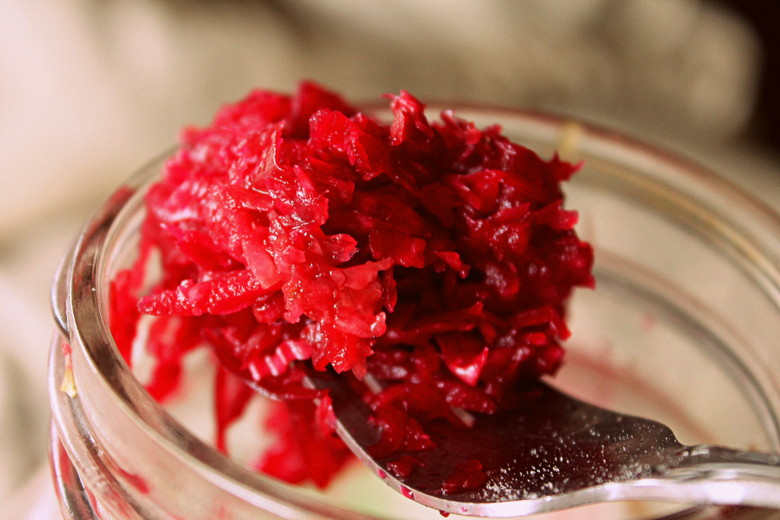
At first the cabbage and daikon retain their pale individuality (as seen above). Eventually, though, they are overcome with the intensity of the beet. But the radish, not one to play second fiddle, fills this kraut with piquancy, coming together with the sweet cabbage and beet to create what tastes not unlike horseradish to me.
Radishes are sprouting in rows, cabbages too from their soil blocks. A big row of beets has been seeded in the chicken field. But right now, while all is young and waiting, there is kraut.
Beet and Daikon Radish Kraut
I recently picked up a mandolin slicer just like this one at a thrift store. It’s not necessary but it cuts way down on the vegetable chopping time.
Ingredients
- 3 medium beets
- 2 large daikon radishes
- 2 small cabbages (or 1 large)
- 3-4 teaspoons sea salt
Directions
- Grate the beets and radishes on a box grater or mandolin slicer. Shred the cabbage as for coleslaw. Combine all ingredients in a large bowl with three teaspoons of the salt. Mix it up with your hands or a wooden spoon and rough it up a bit either with your hands, a kraut pounder, or a wooden spoon. This helps to break down the vegetables and allow the salt to start its work.
- Taste the kraut. It should taste flavorful, like a salad well-seasoned with salt, but not disgustingly salty. If it’s bland, sprinkle in more salt until it meets the aforementioned criteria. Try not to freak out if it tastes slightly salty. Oftentimes the fermentation process mellows the saltiness and you can simply use a little less next time. Also, keep in mind that one of salt’s roles in the fermentation process is to slow things down. When it is warmer, use more salt. When it is cooler, use less. There are no hard and fast rules here.
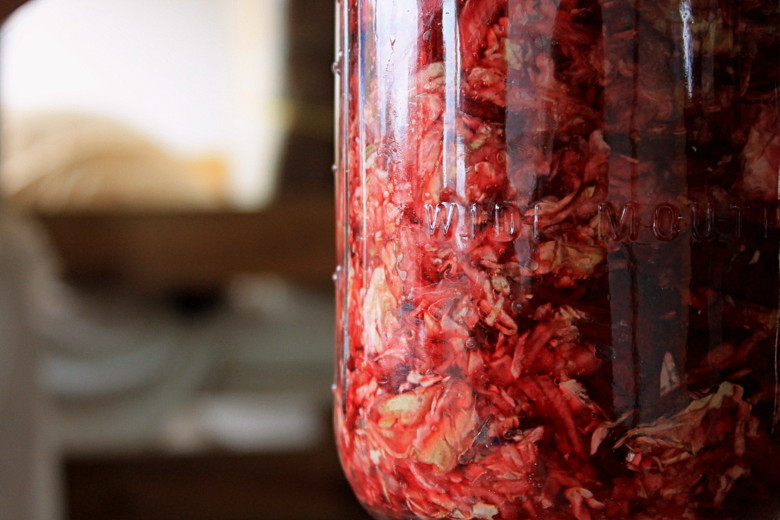
- You can now ferment it right in the bowl using the open-crock technique or transfer it to a non-reactive vessel for fermentation. I used a half-gallon jar for this batch as it makes 5-6 cup of kraut.
- Pack the kraut down tightly so that the juices run above the level of the kraut. Once all of the kraut is in the jar, you need to weight your vegetables down to keep them below the level of the brine. I find this to be the one step you can’t skip. (It’s like making bread without a yeast source. You can use just flour, water, and salt, and hope for the best, but most of the time you’re going to regret not adding sourdough starter or commercial yeast.)
- Now, assess how much brine is in the jar. I don’t use an airlock most of the time so I like a good 1-2″ of brine to be sitting on top of the kraut. If the vegetables themselves haven’t created this much brine, prepare a simple salt brine solution by dissolving 1.5 teaspoons of salt in 1 cup of water. If this isn’t enough, double it. Just be sure that you’ve got ample brine sitting on top of your vegetables and the kraut itself is well below the level of the brine.
- Now comes the fun part. Seal up the jar or vessel and allow it to ferment at a cool room temperature; I like 60-80 degrees but oftentimes it gets warmer than that so don’t worry. Don’t follow obscure rules about a certain number of days. The warmer it is, the sooner it will be fermented. You can eat it after just a few days, when bubbles and other signs of fermentation show up. However, I find it tastes much better, and has gone through the full process of lactic acid fermentation, after a few weeks.
- During this time, carbon dioxide will be given off as a byproduct of fermentation. If you are not using an airlock, it is a good idea to “burp” your jars or vessels periodically. I find that this is most necessary the first 1-2 weeks. Most of the carbon dioxide comes from the first couple of strains of bacteria being formed and after that things die down a bit. If you see bubbles or pressure building up under the lid of a canning jar, then open the jar ever so slightly, release some pressure, and tighten the lid back up. I like to check my jars twice per day during the first week of fermentation, especially if it is warm.
- You’ll know it’s fermented when its good and tangy, the bubbling has died down a bit, and it smells pleasantly sour.
I Am Drooolling!!!
i’ve been making milk kefir and kombucha for about 2 years now. haven’t tried vegetable fermentation maybe it’s time to start it. tempted to make this just for its gorgeous colour!
I am going to try this today! Have some extra beets and cabbage that I didn’t want to go bad. No radish, though, but should turn out okay, I think. Thanks, and hope you have a great day;)