
Saving Cucumber and Summer Squash Seeds
It has been cool and breezy; wet and muddy – really unlike any August I’ve seen since we’ve been here. Though there is a change of seasons in the air, I’ve come to realize that we plant not on a fixed schedule or in terms of months, but rather when there is a path made towards planting. This usually means water and since the Lord has graciously filled our ponds and tanks in recent weeks, we prepare to plant.
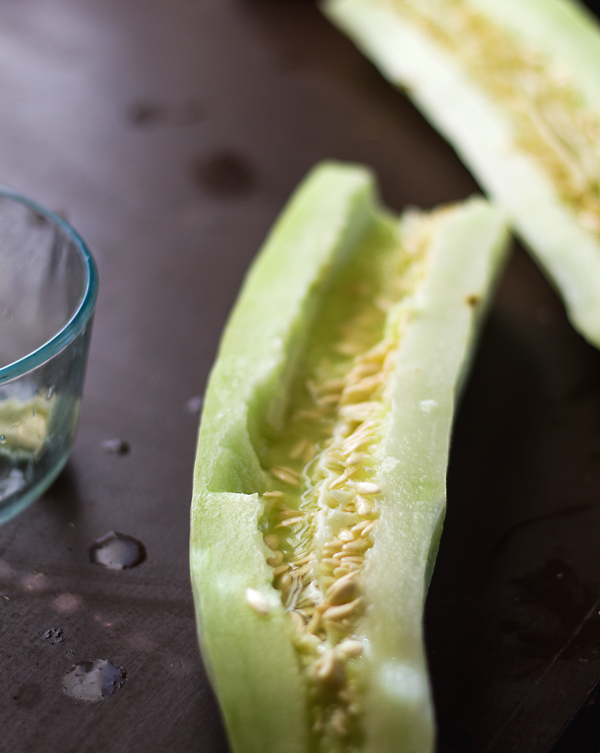
In preparation for the fall garden, we harvested the last of the cucumbers late last week. We are trying to keep in mind that we’ve had an unusual summer, a cool, wet summer, but still these guys produced like mad so it seemed natural to try and save seed.
Saving seed feels like a mighty big commitment to me. Not in the actual doing of the process – that is actually quite simple and pain free. It’s in the not really knowing until next planting season if you’ve done it right. It reminds me of baking pies – they look great but you never really know if it worked out until you cut into it. Likewise, what if I messed it up and we are relying on last year’s saved seed for the garden?
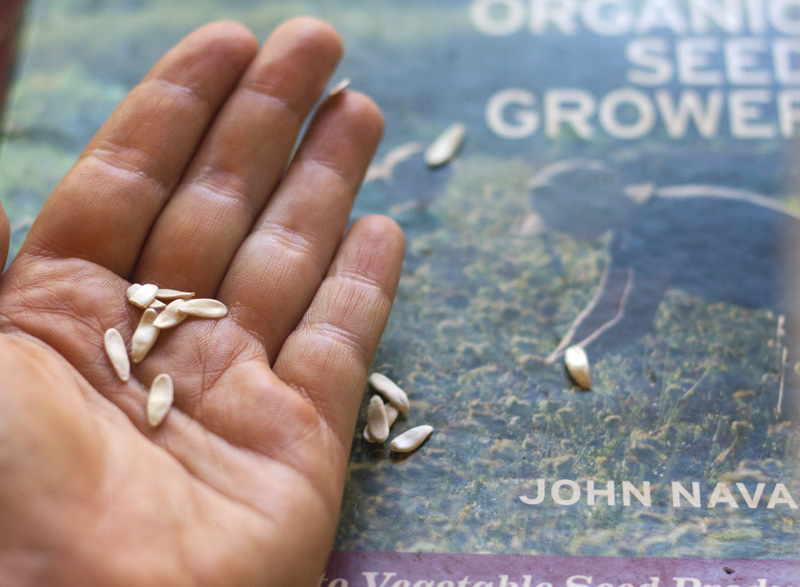
Furthermore, my try at saving last year’s summer squash seed was an absolute bust with a zero percent germination rate. So I embarked on this year’s seed saving with a fair bit of trepidation. Thankfully, I remembered our copy of The Organic Seed Grower which I find to truly be the most comprehensive book on seed saving that I’ve seen.
As I perused the sections on squash and cucumbers I found that I had skipped what appears to be a very important step in the seed saving process last year. Well, that and I completely forgot about the seed as it dried for months on end.
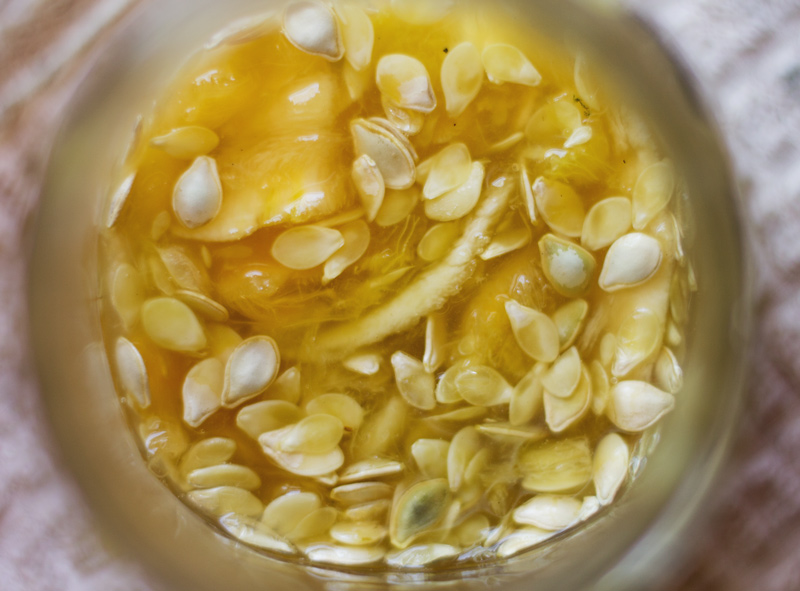
But that step I skipped? It was the fermentation of the seeds in order to remove what the book refers to as a “placental sac” around the seed. I knew that fermentation was common with tomato seed saving but for some reason didn’t think of it for the squash. How ironic that I’d skip my favorite part in the process!
So I tried to follow the basic instructions given for cucumber and squash seeds, as follows:
- Choose a fruit that is large, a bit older than you would eat, and for cucumbers even just a bit yellow.
- Allow the fruit to sit on the counter for a few days to age.
- Slice the fruit in half lengthwise and scoop the seeds out. Place the seeds in a small bowl or jar, along with whatever pulp is attached to the seed.
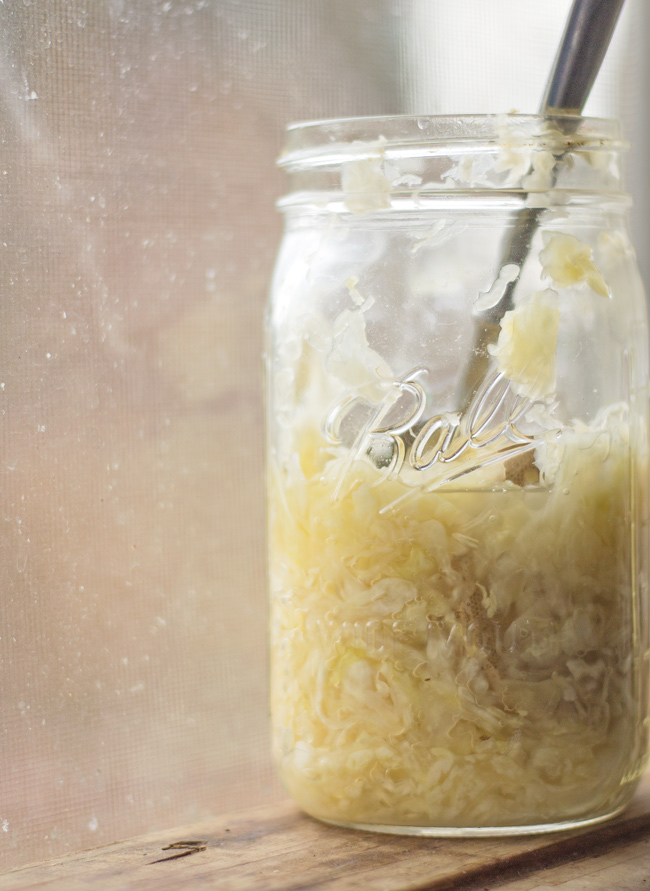
- Using your hand, squish the bits of seed and pulp together gently so that the seeds become covered with the liquid and pulp.
- Cover lightly and leave to ferment for 2-3 days, or until it begins to bubble a bit and a slight film forms on top.
- Pour mixture through a strainer where much of the liquid and pulp are separated from the seeds. Spread the seed out to dry on plates, paper towels, or drying racks, removing any bits of pulp that might remain. Allow to dry for several days and then store in a dark, airtight container in a cool location.
What’s funny is that I didn’t actually end up with any workable squash seed again this year. I saved these seeds on the hottest days of summer and completely forgot about the squash seeds fermenting. So I guess we’ll be buying seed for that again next year and even though it appears that I followed the instructions for the cucumbers, I still think only time will tell.
You could always run a germinatation test on a couple of the seeds. Just plant a couple seeds in cup in windowsill and see if they sprout. Or my favorite is to wrap a few seeds in a damp paper towel and seal them in a ziplock bag or Mason jar out of direct sunlight. Wait several days and check to see if the seeds rot or if little roots start shooting out. That way you can plan to buy or not to buy seeds next year.
Thanks for sharing your journey!
Erin – Thank you! That thought crossed my mind and now you’ve confirmed it. When things slow down I will try to do just that.